Firebase setup
In order to run FireCMS, you need to create a Firebase project first, with some requirements:
Firestore
You need to enable Firestore in it. You can initialise the security rules in test mode to allow reads and writes, but you are encouraged to write rules that are suited for your domain.
Keep in mind that rules should be defined for each collection and should be defined in a way that is suited for your domain.
Please check the Firestore documentation for more information.
In a default Firestore project, it is likely that your Firestore rules will not allow you to read or write to the database. Continue reading to learn how to set up your rules.
For example, a simple rule that allows any authenticated user to read and write to any collection would be:
rules_version = '2';
service cloud.firestore {
  match /databases/{database}/documents {
    match /{document=**} {
      allow read, write: if request.auth != null;
    }
  }
}
but ideally you will want to make it more restrictive. For the demo in the website, you could have rules like this:
For the products demo to work, your rules should look like this:

rules_version = '2';
service cloud.firestore {

    // everything is private by default
    match /{document=**} {
      allow read: if false;
      allow write: if false;
    }

    // allow every read to products collection but write only to authenticated users
    match /databases/{database}/documents {
        match /products/{id=**} {
          allow read: if true;
          allow write: if request.auth != null;
        }
    }

    // allow users to modify only their own user document
    match /users/{userId} {
      allow read, write: if request.auth != null && request.auth.uid == userId;
    }
}
Web app
In the project settings, you need to create a Web app within your project, from which you can get your Firebase config as a Javascript object. That is the object that you need to pass to the CMS.
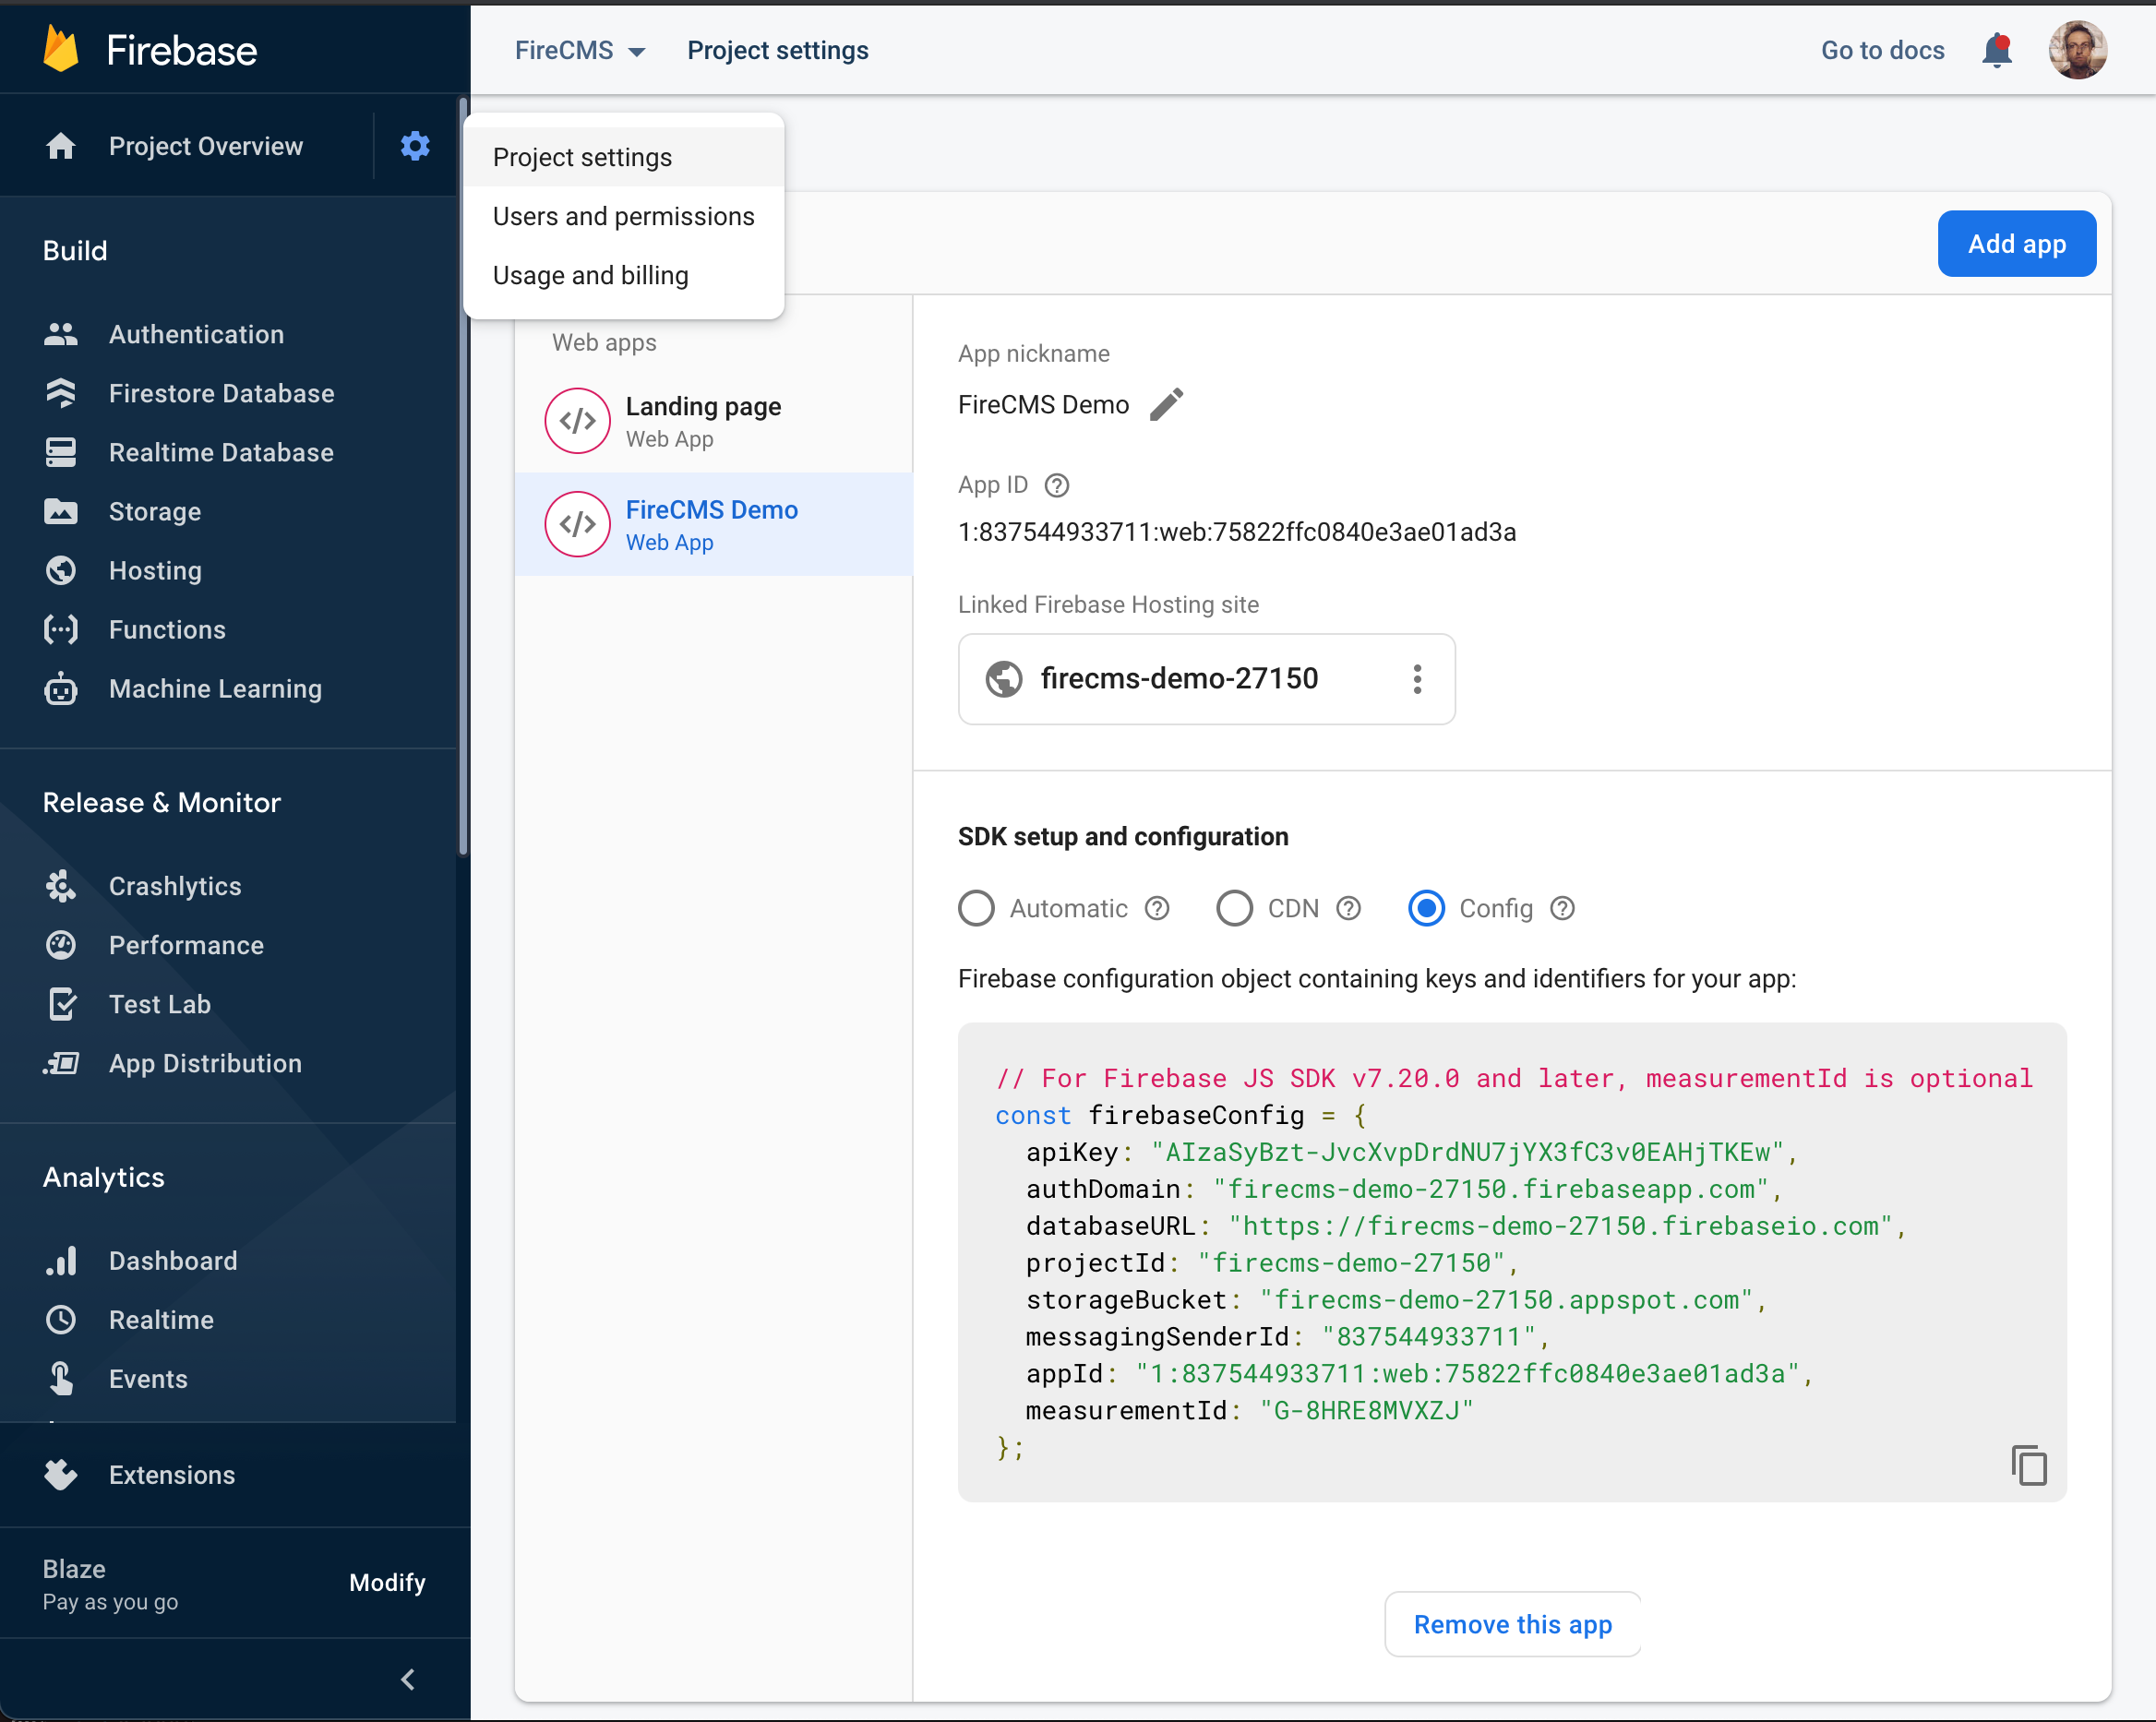
Note that you can also link your new webapp to Firebase Hosting which will allow you to deploy it with very little effort. You can create the Firebase Hosting site at a later stage and link it to your webapp.
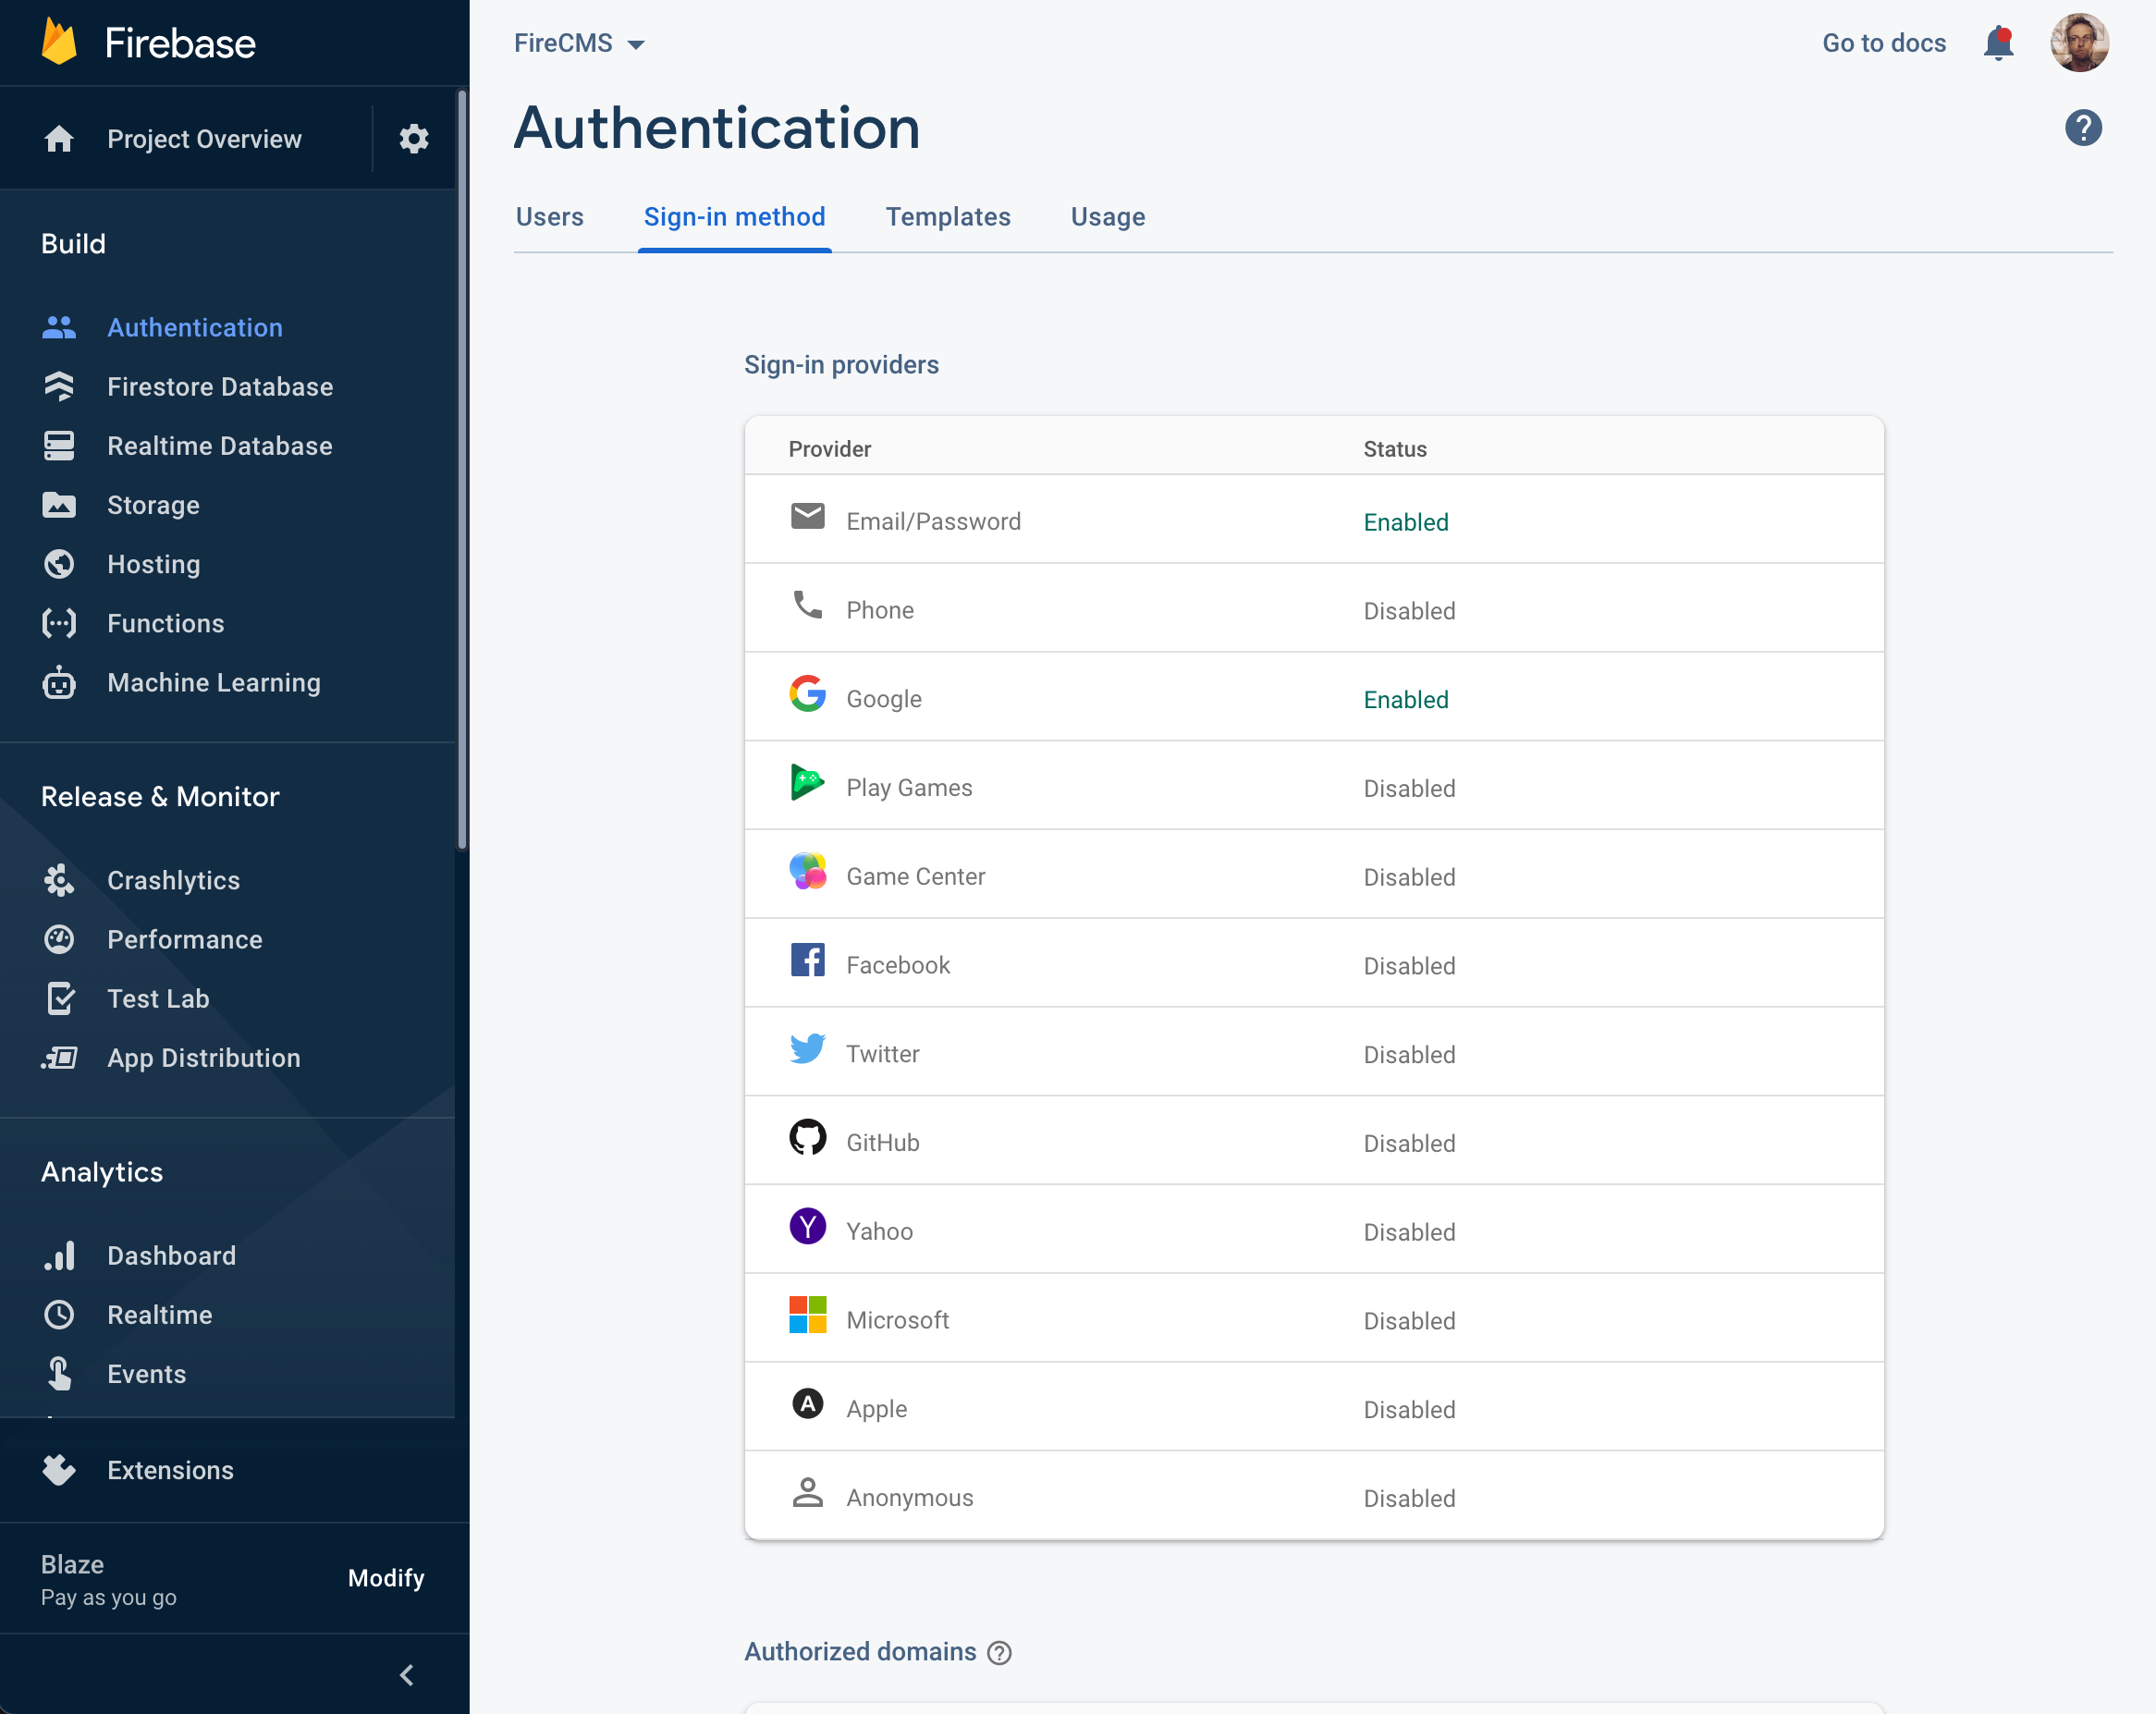
Authentication
You will most likely want to enable authentication in order to pass the login screen
Vite uses the default url http://127.0.0.1:5173 for the development server.
Firebase Auth will require to add this url to the authorized domains in the
Firebase console.
Alternatively, you can use the url http://localhost:5173.
Storage
In case you want to use the different storage fields provided by the CMS, you need to enable Firebase Storage. The default bucket will be used to save your stored files.
If you are experiencing any CORS issues, you can enable CORS in your bucket settings as specified in: https://firebase.google.com/docs/storage/web/download-files#cors_configuration Create a file with the content:
[
  {
    "origin": ["*"],
    "method": ["GET"],
    "maxAgeSeconds": 3600
  }
]
and upload it with: gsutil cors set cors.json gs://<your-cloud-storage-bucket>.